A recall is an appointment reminder for a return visit by a patient and considered a separate entity from an appointment. Depending on how your institution has configured recalls, axiUm can prompt you to create a recall appointment reminder or can automatically create the recall appointment reminder on behalf of the provider after a procedure occurs that requires a recall. If necessary, you can also create reminders manually.
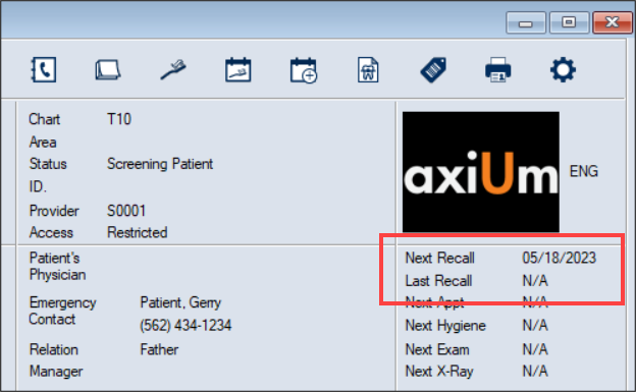
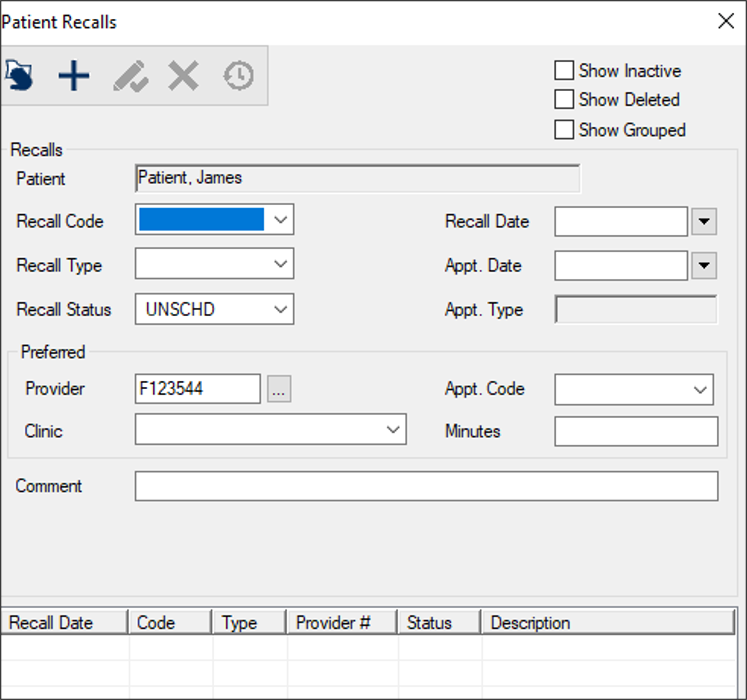
The Patient Recalls window allows you to create and manage recall appointment reminders for the selected patient. Once created, a recall appointment reminder displays the next recall date on the Patient Card window but does not automatically schedule an appointment. When ready to schedule an appointment for a patient with a recall, you can access the Patient Recalls window and select a listed recall appointment reminder to associate with the appointment.
Tip: To facilitate contacting the patient to schedule an appointment, you can use Info Manager to generate and send recall reminder letters to patients or you can contact the patients directly.
To manage patient recalls:
-
Open the Scheduler module to the Active or Pending tab and locate an appointment.
-
Right-click the appointment and select Patient Recalls to display the Patient Recalls window.
Tip: You can also access the Patient Recalls window from the New Appointment and Edit Appointment windows or through the Patients module.
Note: Depending on how your institution has configured recalls, some areas of the window may default according to the user.
-
Review the listed entries.
Tip: If necessary, select any of the following checkboxes:
-
Show Inactive: If selected, completed recalls are included in the list.
-
Show Deleted: If selected, deleted recalls are included in the list in gray text.
-
Show Grouped: If selected, grouped recalls are included in the list.
-
To perform another task, complete any of the following:
 Add Patient Recalls
-
Click the Clear Data ( ) icon.
- Complete the fields as necessary and click the Add a new Record (
 ) icon.
| Recall Code |
Recall codes indicate the length of time between the current date and the date a patient is due to return to the clinic.
Select a recall code from the drop-down list.
Once selected, axiUm calculates the date using the length of time and displays the recall date in the Recall Date field.
|
| Recall Type |
Select a recall type from the drop-down list.
Examples: HYG - Hygiene recall and PER - Periodontal recall.
|
| Recall Status |
Select a recall status from the drop-down list.
|
|
Recall Date |
axiUm auto-populates this field with the date the patient is expected to return for the recall if the Recall Code field is set.
If necessary, select another date from the drop-down calendar.
|
| Appt. Date |
This indicates the date of the actual recall appointment.
Note: If you scheduled a recall appointment for this patient from the Scheduler module, axiUm auto-populates and disables the field.
If necessary, select another date from the drop-down calendar.
|
| Appt. Type |
This read-only field indicates the status of the actual recall appointment.
Examples: Planned, Active, etc.
|
| Provider |
Click the ellipsis to display the Providers List window and select a provider.
|
| Clinic |
Select the clinic the recall should be scheduled in from the drop-down list.
|
| Appt. Code |
Select the appointment code that the recall appointment will be associated with from the drop-down list.
|
| Minutes |
Enter the number of minutes required for the recall appointment.
Tip: This will help you schedule the required length of time when scheduling this patient’s recall appointment.
|
| Comment |
Enter any additional information about this recall.
Example: If cancelling a recall, you can enter the cancellation reason for reporting purposes.
Note: If axiUm creates a recall as a result of a procedure, this field is auto-populated with a description.
|
Edit Patient Recalls
-
Select a listed entry.
-
Make any necessary changes and click the Modify Record ( ) icon.
Delete Patient Recalls
-
Select a listed entry and click the Delete Record ( ) icon.
-
When prompted to confirm your deletion, click Yes.
View Patient Recall History
-
Select a listed entry and click the Show History ( ) icon to display the Patient Recall History window.
-
Select a listed record and review the information as necessary.